Preview and save the result
At the last step you can preview the resulting panorama and save it in the desired format: as a panoramic photo (JPEG image or QuickTime VR), as a web page (four viewers available) or as an executable application. The set of photos used for stitching can be saved as a project file for later using.
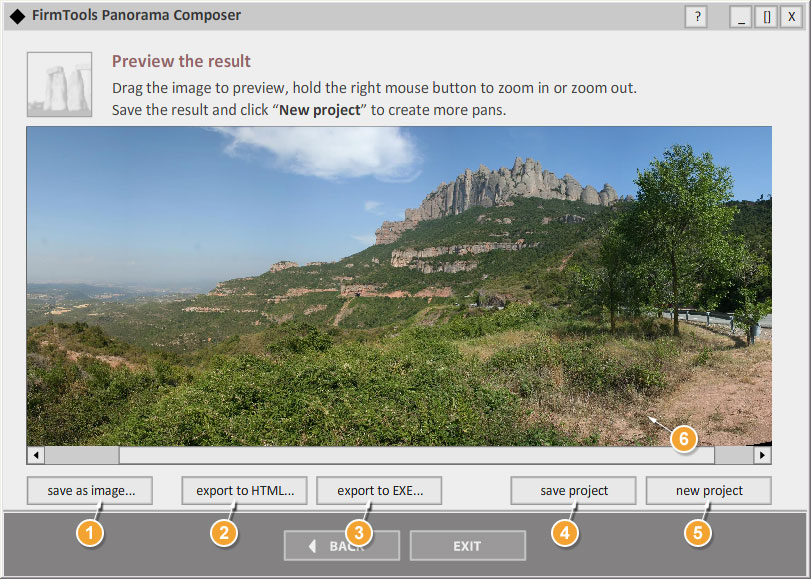
- Click the Save as image button to save the result as a panoramic image (JPEG format) or QuickTime VR object.
- Click the Export to HTML button to save the result as a web-ready HTML page (four different viewers available).
- Click the Export to EXE to save the result as a standalone
executable application.
You can set the size and the quality of the saved panorama in each of the saving methods. Please check the recommended settings and available options in "How to save the resulting panorama".
- Click the Save project button to save your set of photos for later use or modification.
- Click the New project button to start a new panorama creation.
- The resulting panorama preview area.
Hold down right mouse button while dragging in the preview area to Zoom In/Out the pan.